NOTE: This topic has been updated. See Updated Support: Using InstallShield to Create an Installation that Installs Windows Services for the most recent information.
InstallShield lets you create installations that install .NET Windows service applications by executing the installation components in specified assemblies. You can create such a service using a Visual Studio project template called Windows Service, and add installation components that can install resources associated with your service application in the Component Designer of Visual Studio. For more information about creating Windows service applications, see the following Microsoft articles:
After you create and build the application, you can create an installation for your service using InstallShield. The procedure is slightly different, depending on what edition of InstallShield that you are using.
1. Open your Windows service application project—for example, MyNewService—in Visual Studio.
2. For the Express or Limited edition of InstallShield:
![]()
InstallShield
Create native MSIX packages, build clean installs, and build installations in the cloud with InstallShield from Revenera.
- Add a new Express project.
- Navigate to the Files view.
- Select MyNewService under the Visual Studio Solution node in the Source computer’s folders pane.
- Drag the Primary output From MyNewService from the Source computer’s files pane to the Destination computer’s files pane.
- Right-click the MyNewService.Primary output in the Destination computer’s files pane, and select Properties.
- Select the COM & .NET Settings tab and select the Installer Class check box.

- Click the OK button to dismiss the Properties dialog box.
2. For the Premier or Professional edition of InstallShield:
- Add a new Basic MSI project.
- Navigate to the Files and Folders view.
- Select MyNewService under the Visual Studio Solution node in the Source computer’s folders pane.
- Drag the Primary output From MyNewService from the Source computer’s files pane to the Destination computer’s files pane. InstallShield adds the service file as the key file of its component.
- Navigate to the Components view.
- Select the component that contains the service file, and in the .NET Installer Class setting, select Yes.

3. Build your release.
InstallShield adds the custom actions that call the InstallUtil API to install your service when you build your installation. If you create a Visual Studio 2010 or earlier setup project that installs a service, Visual Studio adds the same custom actions to your project as soon as you add the Windows service application file in the Custom Actions view. If you import the Visual Studio setup project into an InstallShield project using the Visual Studio Deployment Project Import Wizard, it will be migrated as the Installer Class setting on the file in InstallShield.
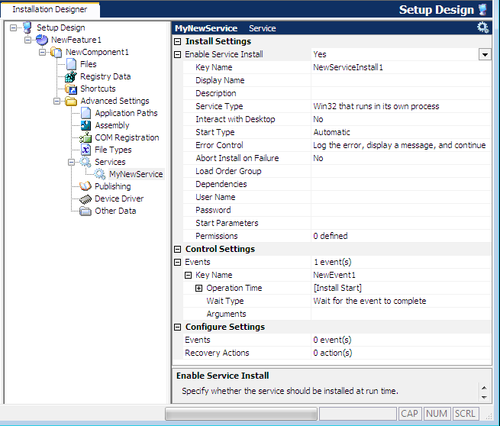
Note that the Professional and Premier editions of InstallShield let you create installations that install Windows service applications by using the native Windows Installer’s capability instead of Installer classes. The Services view is available under the Advanced Settings section of components, and it enables you configure the properties of your services and how you control them during installation. Installer classes are fragile and generally not recommended. If you have trouble installing your services via Installer classes, you may want to consider upgrading to the Professional or Premier edition to use the Services view.