When thinking about creating installation projects, most think of using products such as InstallShield to create them. Over time, you can produce hundreds of windows installer projects and that’s typically the work of one engineer. Imagine what a team can produce. Some diligent IT teams concerned with saving space may, with all good intentions, remove source files that prevent building the next update of the application. Perhaps you’ve been handed the installation (MSI) file and you are the new Subject Matter Expert? No matter how you’ve come across this MSI file if you create new builds or update existing releases, you will need to work with a project (ISM) file.
The good news is you can use InstallShield to Convert the MSI to an InstallShield Project. All is not lost when you no longer have the source files and I will describe the road to recovery in detail.
Using InstallShield to Extract Files from an MSI
When creating new windows installer projects, you want to keep project documentation, source files and completed packages in an organized folder structure of some kind. A sample folder structure taught in Flexera training classes look like what’s shown here.

Once you have created or identified your new project location, you will copy the MSI file into the 1_Orig_Media folder.  Your extracted files will be in the 4_RepackOutput folder and your new MSI will end up in the 6_Completed_Pkg folder.
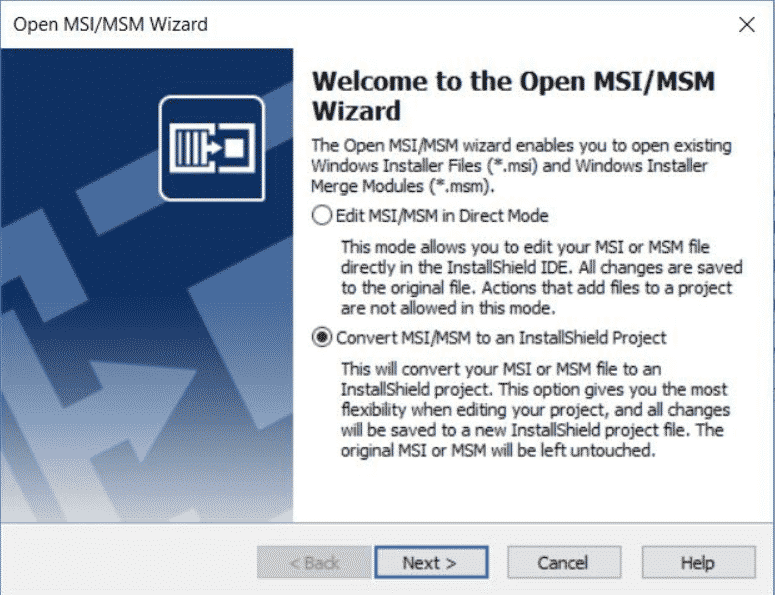
Open InstallShield as we will be browsing for the MSI file you want to convert. If we copied the file to 1_Orig_Media, that’s where we will browse. This is where you need to choose Open with Wizard.
You then need to choose how to open the project. Since the goal is to create a new InstallShield project, choose the second radio button, Convert MSI/MSM to an InstallShield Project.
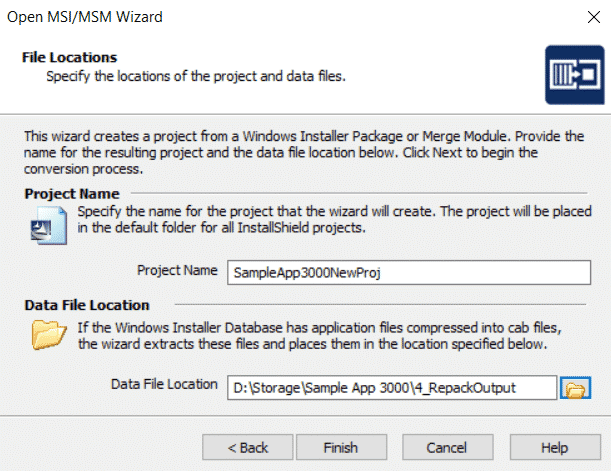
Now, you need to create a name for your project and choose the folder to extract our files to.
In this example, the new project is called SampleApp3000NewProj. As this example uses a standard folder structure, we are choosing the 4_RepackOutput folder as the location to extract the files. Note: The File Locations dialog box allows you to name the new project but does not allow you to choose the file location. Your project file (ism) will be in the default folder for InstallShield projects. This defaults to C:\InstallShield 2016 Projects or the location you specify on the Locations tab from Tool->Options in InstallShield.
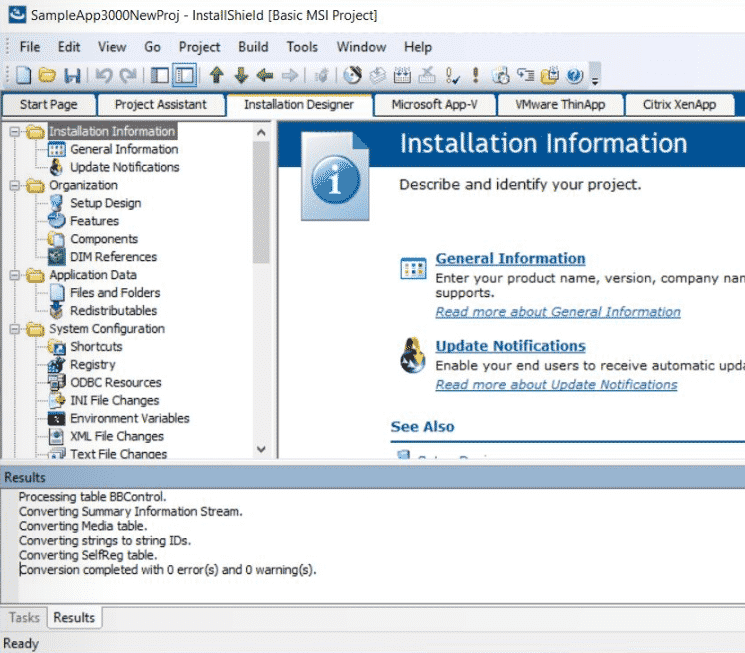
Your project is now ready for updating. At this point, you may now edit your new project as you would with any windows installer project you create. You can add files to or replace existing files that were extracted during this process into your new project.
During the extraction process, we identified the 3_Repack_Output as our output location. 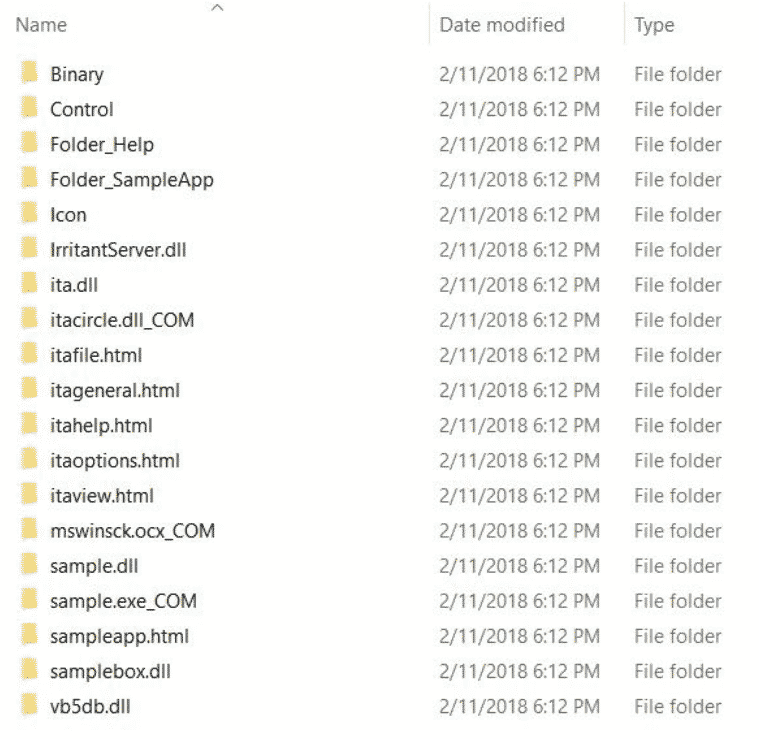 This is where you can find all the files that were included with your project. Notice that the subfolders are named after the components in your new project. Assuming best practices have been followed, expect to see one file per folder if they fall under the Portable Executable category (DLL, OCX, EXE, etc).
Most of the folders in the list here are self-explanatory. The Binary and Icon folders contain images for dialog boxes and shortcuts. Any Custom Actions that are streamed into the binary table will also be found in the Binary folder as well. Some of these “ibd” files can be viewed in an editor such as Notepad (e.g. VB Script custom actions) and some cannot (calling into a function in a DLL).
As mentioned, the Binary folder contains images for dialog boxes and shortcuts as well as custom actions. The screenshot shows a VB custom action that was extracted to a file named NewBinary19.ibd. This file can be modified using Notepad or the editor of your choice.
If your original installer had any Chained MSIs, you are going to want to check Releases under the Media section of your project. Since that’s our next step anyway, we get two for one. First, the release section is where we build our ….. releases. Secondly, this is where we configure our chained MSI’s.
If any chained MSI’s were included in the original installer, you will have to rename the package if the name does not get resolved properly. Below, you can see the new project’s chained MSI package name is not present.

Right-click and Rename the chained MSI package after the name of the MSI you’re installing and you’re good to go.

At this point, you are now free to review each section of your project and make any additional changes. If the goal was to just extract files and create a new project file, mission accomplished. Remember, your project file will be in the default folder for InstallShield projects. Before building my MSI, I will move the SampleApp3000NewProj.ism file into my 5_Project folder.
The GUIDs for the Product Code, Upgrade Code and Package Code are the same as in the original MSI. This project may have an upgrade configured so be careful when changing these GUIDs.
Other modifications could be:
- Verify build settings
- Updating or adding files
- Making registry change
- Creating searches or launch conditions
- Adding Custom Actions
- Everything you can do in a Basic MSI project
Now that the modifications have been made to the new project, you can build the installer file. Just hit <F7> and use the default build parameters or we can use the Release Wizard to configure our installation file. Here you can do a little modification of the build settings and output location of the MSI file. Using a standard folder structure, you can make life easier. Below is a list of what to choose when using the Release Wizard. This results in a single compressed MSI file.
![]()
InstallShield
Create native MSIX packages, build clean installs, and build installations in the cloud with InstallShield from Revenera.
Release Wizard settings for a single compressed MSI:
- Product Configuration – Product Configuration 1/Default
- Specify a Release – Release 1/Default
- Filtering Settings – None/Default
- Setup Languages – English/Default
- Media Type – Network Image/Default
- Release Configuration – Compress All Files
- Setup Launcher – Deselect Create installation launcher (Setup.exe)
- Digital Signature – None/Default
- Release Settings – Change the location to <ISProjectFolder>..\6_Completed_Pkg
- Summary – Deselect “Build the Release” (we want to make one more change)
With Release 1 selected, change the value of Shallow Folder Structure to Yes.
Hit <F7> to build your MSI.
You now have a way to take an MSI that no longer has a project file associated with it and create a new project that you can update or use as a base for the next release. This time make sure you have regular backups in source control so you or a colleague will not face a situation like this again.